|
This document explains how to configure your hosting system so your
resellers can offer
Resellers' Own Wildcard Certificates
In order to allow a reseller set up a shared SSL certificate,
you need to give this reseller a unique IP address. This can be done
by means of shared IP tags. A shared IP tag is a one or two digit 'mark'
that is assigned to customer accounts so accounts with different shared
IP tags can be hosted on different shared IPs. In the plan settings,
you or your resellers will select out of available shared IP tags, after
which new accounts will be created on this new shared IP address. Existing
accounts won't be affected, meaning their old IP address will remain the same.
To create a new IP with a shared IP tag:
- Select L.Servers in the E.Manager menu.
- Click the first web (or win2000) server.
- On the page that appears, enter a new IP address and net mask,
in the Type box select Shared IP, and in the Shared IP Tag
field enter a value from 10 to 99. Click Submit.
- Repeat the previous step for all web and win servers, using a different
(unique) IP addresses for each server, but the same shared IP tag.
- Tell your reseller which shared IP tag he can use. For instance, if you have
two resellers willing to install shared SSL certificates, you need to create
two shared IP tags, e.g. 10 and 11. Then you tell one reseller that he can
use tag 10, and the other, that he can use tag 11. It's a good idea to
check each reseller's plan settings to make sure they are using correct
shared IP tags.
Sharing Your Wildcard Certificates with Resellers
(introduced in 2.3.1 beta 3)
Since a wildcard SSL certificate can secure only third level domains of
one base domain (e.g. *.example.com), you need to dedicate one domain name
that will be available both to your direct end users and to end users of
your resellers. Normally, this would be a neutral domain name unrelated
to the name of your hosting business. Even though end users will still
be hosted on their resellers' domains and will use these domains for http
access (http://user1.resellerdomain.com), they will also get secure access
based on the domain you offer for shared reseller ssl
(https://user1.sharedresellerssldomain.com).
Procedure:
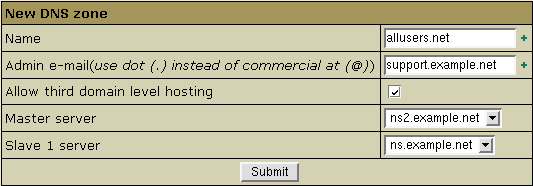
- Select DNS Manager in the E.Manager menu and add a DNS
zone you'd like to secure for shared use:

The DNS zone must appear in the list of available DNS zones. If you are going
to use this zone only to offer shared SSL, you don't need to enable third
level hosting, nor add instant alias or reseller cp alias.
- Install a shared SSL certificate on this domain zone as instructed in the
Installing Shared SSL Certificates
manual.
- Once you have installed the shared SSL certificate, select Shared SSL Manager
in the E.Manager menu:

and enable Share SSL with resellers for the domain zone you have added:

- Now your resellers can enable this shared SSL certificate for use by their end users as instructed by the
Offering Provider's Shared SSL in the Reseller's guide.
If you are using different shared IP tags, make sure that your resellers
use the same shared IP tag as in the main admin control panel Shared SSL settings.
|