|
This document covers the following issues:
Configuration Procedure
H-Sphere physical and logical servers are added and configured according to the following procedure:
- Add physical servers, if any.
- Create server groups.
- Add server groups to these physical servers.
- Add logical servers (web, ns, mail, mysql) to the server groups.
- Add IPs to these logical servers.
- Create service DNS zone
if you don't have it. For instance, if you have are adding mail.example.com logical server,
make sure to have the example.com DNS zone.
- Create a new instant alias template.
- Add DNS A records for each logical server.
If you are adding a mail logical server, you should also add a DNS MX record for it:
- Name: leave empty
- Data: 10 / mail.zone_name For example: 10 / mail.example.com
- Enable user signup on these logical servers.
Physical Servers
By physical servers we mean the hardware.
How Do I Add a Physical Server?
To add a new physical server to H-Sphere do the following:
- Install H-Sphere servers to the new box as instructed
here.
- In your admin control panel, select Add P.Server in the E.Manager menu.
- Click Add Physical Server at the bottom of the page that appears.
- On the next page, enter the name of the physical server, its IP and associated
mask. For Windows servers, also enter a login and password
you chose when installing the Win box.
Don't enter IP2 and Mask2, they are not implemented for
Linux and for Windows.
- At the bottom of the next page, select the group (type) of logical
servers to be placed on this physical server.
E.g.: If you add only web servers and mail servers, you won't
be able to add a DNS server to this physical server in the future.
Note: Win, Win Real and MS SQL server groups are not compatible
with other groups, and each of them requires a separate physical server.
- Select Add P.Server in the E.Manager menu to see the newly added
server in the list of all physical servers in the system.
How Do I Reconfigure a Physical Server?
To reconfigure settings for an existent physical server, do the following:
- Select P.Servers in the E.Manager menu.
- Choose the server.
- On the page you are taken to, you can
change the IP and Mask, Login and Password for Windows servers
and the groups of logical servers assigned to it.
How Do I Delete a Physical Server? (version 2.1 and higher)
A physical server can be deleted only if it's free of logical servers. To delete a physical server, do the following:
- Go to E.Manager -> P.Servers.
- Click the name of the physical server you've decided to delete:

The Delete icon in the Used by entry indicates that no
services are running on the physical server and you can remove it.
Logical Servers
By logical servers we mean the software that runs on physical servers and processes client requests.
How Do I Add a Logical Server?
Before you begin adding a logical server to H-Sphere, make sure to have:
- the physical server added to H-Sphere configuration (see above);
- the logical server software installed (see
here).
To add a new logical server to H-Sphere, do the following:
- Go to your admin control panel.
- Click Add L.Server in the E.Manager menu.
- On the page that appears, enter the properties of the logical server:
- Name: The domain name of the logical server;
- Group: The group of logical servers you are adding this server to.
- Type: The type of the server.
- Physical Server: The box where the logical server is installed. If nothing is available in the dropdown box, add this server group to the physical server first.
- Description: The note that will help you identify this server among others.
- File Server: Reserved for future implementation.
- File Path: Reserved for future implementation.
- Add DNS records for this logical server, as suggested in the DNS Configuration guide.
- If you are adding a web server, select Shared SSL Manager in the E.Manager menu,
click the Edit icon next to the domain name and enter the certificate key and certificate file
in the Install completely new certificate key and file pair boxes. Then click the Upload button.
This will update the shared SSL certificate installation on all servers, including the newly installed one.
How Do I Add IPs to a Logical Server?
To add IPs you have obtained from an Internet service provider:
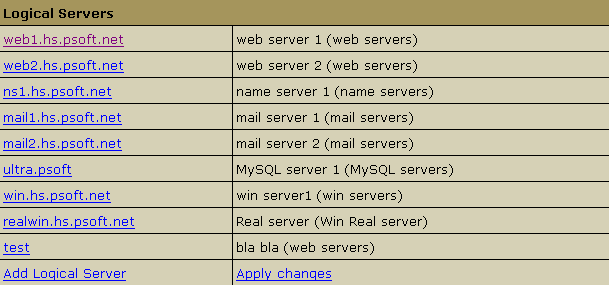
- Select L.Servers in the E.Manager menu:

- You will be taken to the list of all logical servers
in the system. Click the server you would like to edit:
- On the page that appears, enter one default shared
IP, one or more tagged shared IPs, or a range of dedicated IPs:

- From: enter the shared IP or the first IP of the range of dedicated IPs.
- To: enter the last IP of the range of dedicated IP's.
- Mask: enter the network mask -- you should have
received it from your Internet Service Provider.
- Type: select the type of IP you are adding to the system:

- Dedicated IP - the site/service will have an
IP dedicated to that alone. Choose it only for web and
mail servers.
- Shared IP - multiple web sites will use use
the same IP address via typical Virtual hosting. Choose
it only for web and mail servers.
- System Management IP - reserved for future
use. Don't select it.
- Service IP - choose it for all logical servers
other than web and mail.
- DNS Reseller IP - choose it only for reseller's
name server aliases (version 2.08 and higher).
- Shared IP Tag: a digital "mark" that
helps separate sites on one logical server. It allows you
to allocate a separate shared IP for a group of sites of,
say, explicit nature. This may become necessary as many
corporate firewalls filter sites based on their IP, not
the domain name.
When added to the logical web server, dedicated IP's are
not registered in ipconfig. They are only added when
new accounts are created.
WARNING: Make sure the same dedicated or shared IP's
are not used by more than 1 server.
- Added IPs will show up in the IPs entry, Logical Server section.
IMPORTANT (versions 2.05-2.08 only): When you are through
with adding new (or reconfiguring the existent) logical servers,
apply your changes by going to L.Servers and
clicking Apply Changes at the
bottom of the logical servers list.
How Do I Enable User Signup on a Server?
By default, customer signup is disabled on new logical servers. Sometimes
you may want to keep it disabled to provide dedicated servers to individual
customers or to prevent them from getting overloaded. In most cases, however,
you would need to turn it on.
To enable user signup:
- Do steps 1 and 2 of the adding IPs
section to see the properties of this logical server.
- On the page that appears, turn on the Available for signup option.
How Do I Remove a Logical Server?
To remove a logical server:
- Make sure no accounts, mail domains, web sites or other
resources are run on it.
- Delete all the IPs designated to it (E.Manager ->
L.Servers -> 'selected logical server' page).
- Click the Delete icon which will then appear
in the Usage field.
How Do I Put Several DNS Servers On One Box?
You can have more than one DNS servers on one box. However, if you'd like
to put your DNS servers on more than one box, you need to put each of them
on a separate box.
To put two or more DNS servers on one box, do the following:
- Add IPs you need into the "listen-on" parameters of the
named.conf configuration file.
- Copy the three scripts from the /hsphere/shared/scripts/SingleDNS/
directory into the /hsphere/shared/scripts/ directory
replacing the existing scripts.
- Execute the /hsphere/shared/scripts/fix_perm.sh
script to fix the H-Sphere scripts permissions.
- Add the second H-Sphere DNS logical server with your additional
IP using the same physical server. New domain zones will
be created using 2 logical DNS servers.
You may also need to edit the zone file for the primary domain and
add a second NS record.
Note: After you put the second DNS server on the box,
the old DNS zones will still have only one old DNS server.
How do I assign master and slave roles to DNS logical servers?
(version 2.3 RC 4 and higher)
- Go to E.Manager -> L.Servers.
- Click DNS logical server name. You'll be taken to its configuration page. At the bottom of the page
you'll see the Additional options form:

- From the DNS role drop-down box choose either master or slave1 or slave2.
- Repeat steps 1-3 for the rest of your DNS logical servers.
If DNS logical servers are not assigned any roles or more than one DNS logical servers are assigned
the same role (e.g. two master or two slave1 servers), H-Sphere will randomly assign "master" to one
of them and address another one as "slave". In this case it's quite likely that the same DNS logical server
will have different roles for different DNS zones.
How do I limit resellers to particular DNS logical servers?
(version 2.3 RC 4 and higher)
- Go to E.Manager -> L.Servers.
- Click DNS logical server name. You'll be taken to its configuration page. At the bottom of the page
you'll see the Additional options form:
- From the Used by drop-down box choose:
- all accounts to allow both regular and reseller customer accounts to use this DNS logical server;
- resellers only to allow only reseller end customer accounts to use this DNS logical server;
- master admin only to allow only your regular customer accounts to use this DNS logical server.
Important: if all DNS logical servers are used by the same group, singups from under the other group will fail.
How Do I Set Mail Relays?
version 2.1 and higher
There are two SMTP relays you can choose for each individual mail server -
POP before SMTP and SMTP AUTH. In POP before SMTP, the relay system
collects IP addresses of users who successfully authenticate themselves with a POP
server, and then permits SMTP relaying from that IP address for a short period of
time. If clients do not have known IP addresses, relays use SMTP AUTH, which is
a protocol based on SMTP, in which the client must send a name and password in
addition to the normal SMTP envelope information. Obviously this requires a
special client, which has been configured to use this protocol.
To specify protocol for a specific server:
- Select Mail Servers in the E.Manager menu.
- At the top of the page that appears, click the Change icon next to the mail server.
- Select the protocol and click Update.
Server Groups
Logical servers are grouped by functionality and purpose.
For instance, you can have a group of name servers, a group
of 'priority' web servers, a group of 'basic' web servers etc.
Logical server groups allow you to control the distribution
of user data across servers.
Example: You have several customers on
a priority hosting plan and you want to keep their sites on a
separate box. To achieve this, you need to create a separate
'priority web' server group and add it to this box.
You can add one server group to many physical servers.
For instance, if you add the 'priority web' server group
to p.server1, p.server2, and p.server3, your priority
plan customers will be randomly distributed across these
three physical servers.
A physical server may have one or many server groups.
For instance, you can add the 'priority web' server group
to p.server1 and p.server2, whereas all other server groups
can be added to p.server3.
Note: You can't add a logical server to a physical
server if it doesn't have the respective server group.
|
Consider another example:
Let's say you've got:
- p.server1 with the following groups on it: Control Panel, Mail, Web, Name and
- p.server2 with Mail, Real and MySQL server groups.
In this case logical servers:
- cp.net,
web.net, name.net can be set up only on ph_server_1
and real.net with mysql.net - on ph_server_2;
- while mail.net can be set up to any of them.
You can also have two logical servers carrying out mail
service (e.g.: mail1.net and mail2.net) set
up on different or the same physical server. Several
different web, name, etc., logical servers can be put on
one physical server, too. The only requirement is that it
has the appropriate server group.
|
To see the server groups available in your system, go to
E.Manager-> Server Groups:

How Do I Create a Server Group?
- Select P.Servers in the E.Manager menu.
- At the bottom of the page that appears, enter
the name of the server group and select its type.
- Click Add.
How Do I Add a Group to a Physical Server?
- Select P.Servers in the E.Manager menu.
- Click the name of the physical server.
- At the bottom of the page that appears, select a server group
and click Add.
- Now you can create logical servers in this server group.
How do I delete a server group?
(version 2.1 and higher)
You can delete only custom server groups by clicking
the Delete icon next to them.
|