|
Here you will learn how to customize the look and feel of your customers' control panels.
These settings will affect control panels of your direct end users and resellers. Resellers'
admin control panels and the control panels of resellers' end users won't be affected; their
look and feel must be configured from the reseller admin control panels.
Images
 |
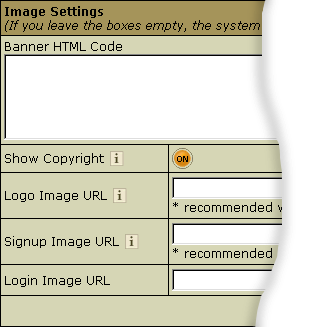
- Banner HTML Code: enter the HTML code for
the banner you want to show up both in admin and your
users control panels.
E.g.:<a href="http://www.destination_company.com/cgi-bin/blah-blah.cgi"
target="blah-bhlah"> <img src="http://www.domain.com/images//banner.gif"
width=468 height=60></a>
Tip: it might be just an image, for example,
your logo.
|
- Show Copyright: toggle the button to show
/ hide the copyright notice in the top left corner
of the window above the logo both in admin and user
control panels.
|
- Logo Image URL: enter the URL address of
the image to show up in the top left corner of the
window.
E.g.: http://www.domain.com/images/logo.gif
|
- Signup Image URL: enter the URL address of
the image to show up in the left top corner of the
windows for plan signup forms.
E.g.: http://www.domain.com/images/signup.gif
|
- Login Image URL: enter the URL address of
the image to show up on the logging page on the right.
E.g.: http://www.domain.com/images/login.gif
|
Important: Your own custom images added to the H-Sphere
interface can be lost with the new release update unless you
put them into the /hsphere/local/home/cpanel/shiva/shiva-templates/common/IMAGES/
directory.
Design and Colors
Starting with version 2.1, you can choose out of current
designs and color schemes for user's control panel.
Admin panel interface customizability will
be added in the future updates.
To set a new preferred (i.e. default) design for the
user control panel, do the following:
- Select Design Settings from the Look and Feel menu.
- In the Choose Design box select the default design.
- Click the Modify button.
- On the page that appears, change the settings:

- Users can choose this design - this option determines whether
this design becomes available to your customers;
* In all H-Sphere versions released before version 2.3 (2.096 - 2.2) Left Menu design can't be disabled.
Starting from version 2.3 it can be disabled for users as all other designs.
- New users will get this design as default - switching this option
on will switch it off for all other designs;
- Choose another design - go to another design to modify.
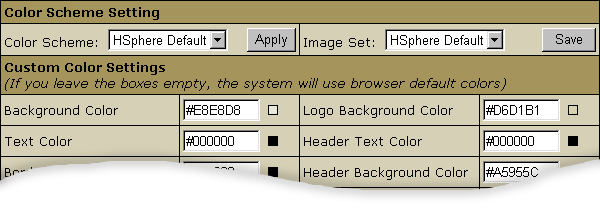
- For each design (common, text based, no menu) you can set different image and icon set and also create only one custom
color scheme, by changing and retouching one of the predefined
color schemes.
* If you choose default color scheme, your custom color scheme settings
will be lost.


- Click the Preview Window icon at the bottom of the page to see how
your settings will effect users' control panel.
- Now you can return to editing design settings or leave the Design Settings
page.
Customizing H-Sphere Images
To substitute or customize default H-Sphere images, please follow the instructions below:
1. Copy all the images (/hsphere/local/home/shiva/shiva-templates/IMAGES/) to your custom location.
Important: To do this, log in to your CP server as the cpanel user, e.g., under root:
su - cpanel
To implement customization correctly, all template files and directories should have cpanel:cpanel ownership.
2. Once you have copied the images, replace those that you decided to change
with your custom ones preserving their sizes.
3. Go to Look and Feel -> Design Settings and click the Change button.
4. Specify your custom location in the Base Image Directory field:
.

This location must be either a fully qualified URL of your host or
a directory path relative to the CP Web Server Document Root.
5. If you made a mistake and your images do not show,
just clear the Base Image Directory field, and click Submit. The original path will be restored.
Company Information
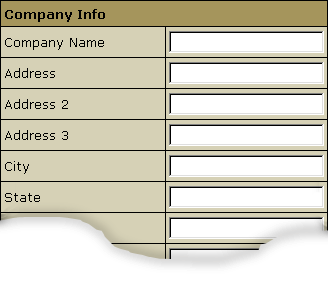
The system holds your company's name, mailing address and other details that are used across the
control panel, including the letters e-mailed to the user, requests to Enom and OpenSRS, etc. To
enter your company info:
- Select Company Info in the Look and Feel menu.
- Enter your details:

Don't confuse:
- e-mail: the e-mail you can be contacted at.
- Hostmaster E-mail: your sysadmin e-mail address. Use
a dot "." instead of "@" in the e-mail address.
Interface Texts
| Menu Item |
Appear |
| Login Texts |
on the login page |
| Signup Texts |
on signup wizard pages |
| Misc.Texts |
Customer Support info |
in the tooltip area when an action fails to execute with an error message
written to the log and e-mailed to the support e-mail address |
| Checks Info |
in signup wizard ("Send your checks to"),
in check invoice notifications,
in check approaching resources limit notifications,
etc.
|
| Privacy Statement |
reserved for future implementation
|
| Sales Info |
*If you leave any of the boxes empty, the system will use
the texts that come with the original installation.
Interface Language
(version 2.07 and higher)
This feature allows you to change the Default Language of
your system's interface both for you and your users' control
panels (menu, context online help, H-Sphere system messages,
labels on html pages etc.) However, your users will always
be able to override these settings with another available
language to adjust their CP interface according to their liking.
Currently H-Sphere comes with the following languages: English,
Russian, Italian, French, Spanish and Dutch (the 4 latter
languages in 2.09.5 and higher).
Regional Settings
(version 2.09 and higher)
This feature allows you to change currency symbol
in the way that is common in your country. These settings will affect user
control panels and automatic customer e-mail notifications and invoices.
To change regional settings:
- Select Regional Options in the Look and Feel menu.
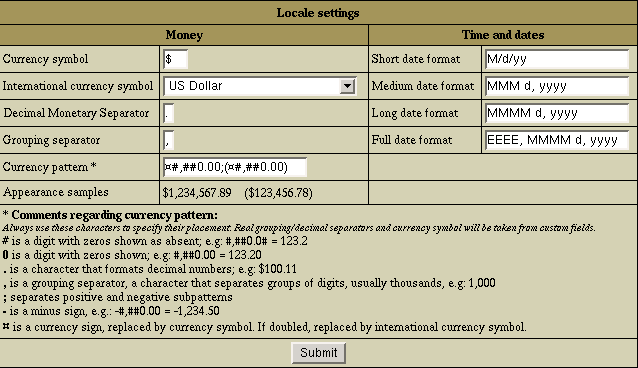
- On the page that appears, enter preferred locale settings:

- Currency symbol used in your country that you want to show in prices, invoices etc.
- Corresponding International currency symbol which is an international string denoting the local currency.
- Decimal Monetary Separator, a character used to format decimal numbers.
- Grouping Separator, a grouping character used to separate thousands, e.g: 100,000,000.
Note: It's commonly used for thousands, but in some countries it separates ten-thousands.
- Currency pattern that shows how your monetary amount will look like. Refer to Comments regarding currency pattern for details.
For example, the European currency pattern will look as follows:
# ¤,##0.00;-# ¤,##0.00 (in some countries negative subpatterns are put into brackets: # ¤,##0.00;(# ¤,##0.00))
Another example for pattern: #,##0.##: for 3456.00 -> 3,456 althought #,0#0.00: for 3,456.00 -> 3,456.00.
- Appearance Samples displays monetary amounts the way they will show in the system after you change the pattern.
- Short, medium, long and full date formats represent dates in your control panel. This feature is not yet implemented, though reserved for future versions.
- Click Submit and take a look at the values in the Appearance samples
box to see how your changes will affect monetary amounts throughout the control panel.
|